25 DIY Screen Door Projects To Keep Out Uninvited Invaders

Building a DIY screen door is a fantastic project to beautify and add character to your home. It’s also the best way to protect your home from pests and bugs when you open your door to let in fresh air.

A DIY screen door is easy to build and with summer already here, you can also make one to keep out bugs from your home, patio or garage, so you can enjoy the sweet summer breeze.

Here are 25 DIY screen door projects to keep out uninvited invaders from your home.

DIY Screen Door Ideas With Tutorials

1. Wooden Screen Door

This plan involves making a DIY screen door like this one by thediydreamer from wood boards and other materials. The project is easy and requires no specific carpentry skill; however, you will need a few carpentry tools to get it done. On completing the project, you can then paint it with your desired color.

Wooden Screen Door
Image via: thediydreamer

2. Single 2X6 Screen Door

This DIY project involves replacing an old and worn out screen-door. The original plan was made with a single 2×6 wood, it has a video which gives a step by step guide on how to make the screen door like this one by instructables.

The project can be completed within a day, and costs just around $15. You can also tweak the plan and change the size to suit your door frame.
Single 2X6 Screen Door
Image via: instructables

3. Wood Screen Door

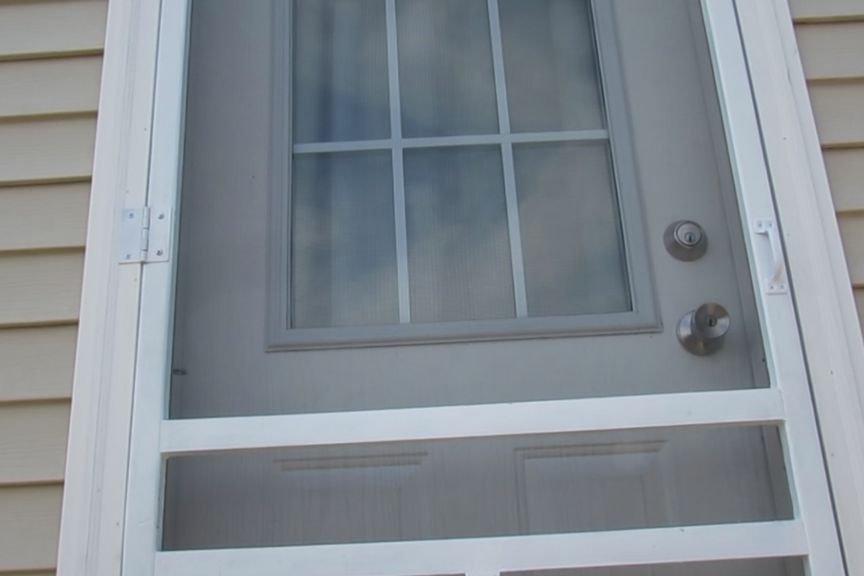
A DIY door allows you to open your door and let in fresh air. If you don’t have one in your home, you can follow this plan to make yourself custom screen doors by sawsonskates that will suit your home perfectly. The design is a simple DIY screen door, with a rail at the middle and another dividing the lower part. You will need wood boards and a few other supplies and tools to get started. The plan contains a detailed guide on how you can build the screen door with pictures. You may also like to check out diy screen in porch.

Front Door Screen Door
Image via: sawsonskates

4. Flat DIY Screen Door

You can follow this plan to create a sturdy and affordable DIY screen door like this one by designertrapped for your home. The design is a modern screen made of lumber wood and other materials. It has a rail diving it at the middle and two others separating the lower part of the screen door. The project is placed at an intermediary difficulty level and requires an essential woodworking skill; however, if you have done one or two DIY projects before, then you can certainly tackle this one. You may also like to check out diy barn doors.

Flat DIY Screen Door
Image via: designertrapped

5. Garden Screen Door

If you have a non- standard door size, it could be hard for you to find your desired screen door at the store, which leaves you with the option of building a customized one that matches the measurement. This project involves making a screen patio door like this one by empressofdirt for a nonstandard sized door using a 2×4 wood plumber. The project cost under $35. The design can be precut at the lumber store, so you can easily couple it at home.

Garden Screen Door
Image via: empressofdirt

6. Plain Screen Door

With summer already here, it’s time to start building some cheap screen doors to let the fresh air into the house, without worrying about pests and bugs. The plan involves building a full-length screen door like this one by hgtv without middle rail. The simple design makes it suitable, as it would allow more air in, compared to the covered ones. You will need wooden boards, screen materials and a few other supplies and tools to complete the project.

Plain Screen Door
Image via: hgtv

7. Build a Screen Door

A wooden screen door like this one by thisoldhouse will be the best choice to keep away crickets and bugs from getting into your home. Already made doors at the store have limited designs and can be quite expensive. The best bet is to buy a door kit and assemble it yourself. Millwork companies make parts for screen doors and have different designs and measurements, so you need to get glue, screening and a few other materials to assemble the screen door. You may also like to check out diy privacy screen.

Build a Screen Door
Image via: thisoldhouse

8. Rustic Screen Door

Screen doors are naturally thin and lightweight to ensure they fit the already occupied door frame, and this causes most screen doors to be flimsy. However, with this plan, you will learn how to make a screen doors like this one by grit that’s sturdy and durable. This DIY screen door is made of rustic wood and can be completed in a day.

The original plan has a rail at the middle and the screen covering its full length to let air in and keep out bugs and insects.

Rustic Screen Door
Image via: grit

9. Simple Exterior Door Screen Curtain

If you don’t want to cover your elegant door with a screen door like this one by scjohnson then you should consider making a screen curtain that can be attached to your front door. This screen curtain idea is perfect, as it allows air into the home, keeps away bugs and enabling easy entry and exit through the door. You will need a roll of Black Fiberglass Screening and some other materials to get this done.

Simple Exterior Door Screen Curtain
Image via: scjohnson

10. Screen Door For the Pantry

A new screen door costs about $150 – $200, however with this plan, you can build a customized screen door like this one by wildfireinteriors for as little as $18. The design is very sturdy and durable; it’s made with a 1×4 lumber. The door is separated in the middle by rail. The lower part is covered entirely, while the upper portion carries the screen.

Screen Door For the Pantry
Image via: wildfireinteriors

11. Wooden Storm Door

A storm door isn’t just useful for keeping out the wind and rain, it a beautifying factor in your home entrance that your guests see when they visit.  A durable and attractive storm door is essential for every home, and you can follow this plan to build one for yourself. The original plan is a standard sized storm door made from weather-hardy wood, and some other materials. This screen door by popularwoodworking isn’t hard to make; you just have to follow the instructions on the plan.

Wooden Storm Door
Image via: popularwoodworking

12. DIY Garage Door Screen With a Zipper

Getting a sliding screen door like this one by thriftdiving installed in your garage can come at an enormous cost; however, if you need something simple and less costly, then you can make this DIY garage door screen with zipper. This door screen will let fresh air in a while keeping bugs out of your garage. You will need a roll of fiberglass screen and a few other materials to get started.

The design is straightforward; the zipper is in the center of the screen and allows access, in and out of the garage. You may also like to check out plants to keep flies and mosquitoes away.

DIY Garage Door Screen With a Zipper
Image via: thriftdiving

13. Reforming An Existing Screen Door

Getting a new screen door like this one by inmyownstyle that meets your requirement from the store could be quite hectic, and  if you find a sturdy one, it might be ugly. And when you find one that’s beautiful, it might be flimsy. If you decide to buy any available one, then you can follow this plan to tweak it to your taste. You can change the color, size and other aspects of it.

Reforming An Existing Screen Door
Image via: inmyownstyle.com

14. Chippendale Screen Door

If you need a stylish screen door for your home, then you should build this Chippendale screen door by redcottagechronicles. The design is an elegant screen door segmented at the middle. While the top is covered with screen, the bottom is beautifully designed. This is one project that will put a smile on your face anytime you return home. You will need wood lumbers, a roll of fiberglass screen and a couple of other materials and tools to build it.

Chippendale Screen Door
Image via: redcottagechronicles

15. Simple Wooden Screen Door

It’s always fun to make items in the home yourself. This plan involves making ascreen door like this one by runnerduck for a front door from wooden lumbers and fiberglass screen . The first thing to do before embarking on this project is to know the size of your screen door, and then decide on the design you wish to use. You can tweak the size and design of this plan to meet your specification.

Simple Wooden Screen Door
Image via: runnerduck

16. Front Door Screen Door

Having a screen door in place is one way to ensure you enjoy the summer delights. You can open up your door without worrying about bugs and insects. This DIY plan will show you steps on how to make a sturdy, customizable and easy to build DIY screen door by sawsonskates that will keep out unwanted flying visitors while letting in fresh air to your home. You should work on every piece of the screen door individually, and paint if you desire, before coupling.

Front Door Screen Door
Image via: sawsonskates

17. Screen Door From Scrap Wood

This plan involves making a DIY screen door like this one by justmeasuringup from scrap wood. The design is a fancy standard door sized screen, with a rail at the middle. You will spend less on this project if you have leftover woods from previous DIY projects. The plan is straightforward to build, even for a first time DIYer. Follow the plan and cut out every part of the door before coupling. You may also like to check out natural tick repellents.

Screen Door From Scrap Wood
Image via: justmeasuringup

18. Pallet Board Screen Door

Soon we will experience the warm evening breeze filling the air; and you will likely open the door to enjoy the summer delight. Making this DIY door by made from a pallet is the first step to ensuring you have a pleasurable experience, you don’t want bugs under the sofa.

This project is amazingly cheap; it can be completed for about $12 total. The design is straightforward and can be quickly built by anyone with the right tools.

Pallet Board Screen Door

19. Screen Door for Under $50.00

If you want a custom door which is stronger and more durable, then you should consider this DIY screen door. The door is built from plywood, and other essential materials and tools. The design is a farmhouse-style screen door separated at the middle with a rail. The top is sealed with a screen, while the lower part is covered with wood. This DIY screen door will give your home a fabulous curb appeal.

Screen Door for Under $50.00

20. Screen Door From Pine

It’s one thing having a screen door like this one by lisalaker, and another thing having one that adds personality to your home. This plan is tailored to allow you to change both the design and the size as you wish. It’s made of wood pine. You will have to measure the size of your door to know how to shape the plan. The design is a bottom covered screen door with a screen-guarded top.

Screen Door From Pine
Image via: lisalaker

21. Sliding Screen Door

This DIY idea involves building a sliding screen door by garagejournal to protect the house from bugs while allowing the entrance of fresh air. Stainless hardware, cedar board, solar mesh and a few other materials are used to build this board. There is also an attached plan for making screen covers for windows from cedar boards. You will need roller tracks and fiberglass screen for this project.

 Sliding Screen Door
Image via: garagejournal

22. Pallet Screen Door

If you are looking for a cheap and easy way to get a better cool breeze into your house without worrying about bugs, flies, and insects, then this project is ideal. It involves making a DIY screen door like this one by instructables from pallet wood. The total cost for this project is under $25, and it is very easy to make. You need first to salvage the pallet, remove nails and dirt before you start building.

Pallet Screen Door
Image via: instructables

23. Screen Door Out of an Old Window

This DIY screen door idea by instructables was borne out of the maker’s inability to find the right screen door size for her home. It involves salvaging old windows to make fly screen doors. The outcome is a classic screen door with screen covered top and wood covered bottom. The project turned out to be sturdier and durable compared to those you will get from stores.

Screen Door Out of an Old Window
Image via: instructables

24. Install a Retractable Screen Door

If you love to open your front door, then you will be in trouble if you don’t have a screen door in place. This plan contains instructions on how to install a retractable screen door like this one by addicted2diy to keep away pests from your home. This is more suitable for those who may not want to build the screen door from scratch. You will need to purchase the retractable screen door and then follow the guide to install it.

Install a Retractable Screen Door
Image via: addicted2diy.com

25. DIY Adorned Screen Door

It takes money to build a beautiful screen door, however instead of entirely dispersing your existing door; you can follow this plan to remake it into a beautiful antique screen door like this one by bonniechristine This project can be completed in a few hours, and it’s effortless to make. You will need rescreening tools, corner brackets, and a few other materials to get this done.

DIY Adorned Screen Door
Image via: bonniechristine

Summary:

Conclusively, building a screen door for your home is the ideal project to embark on with the family during the weekend. It’s a fun activity which will make life easy and more pleasurable for you. Choose one of the listed plans and start building.

25 Fabulous DIY Rain Chain Ideas With Tutorials

Mounting DIY rain chains are a beautiful way to harness the power of water; watching the rain chain guide the water from the roof to the ground is a sight to behold.

A DIY rain chain is necessary for every home especially as it helps protect the foundation of your home from water splash while channeling the water wherever you desire. The rain chain not only brings functionality, but it also adds beauty to your home.

Here are fabulous DIY rain chain ideas with tutorials, you can quickly build.

1. Ombre Rain Chain

Rain chains are always fascinating, especially when its made from beautiful copper chains.

Making this copper rain chain by designsponge is super easy, following this plan; the rain chain is made with terracotta pots held together by a copper chain.

You can complete this project within a few hours, and it requires no particular skill; need some necessary supplies and tools. You can also paint the pot to your desired color.

Ombre Rain Chain
Image via: designsponge

2. Recycled Soda Bottles/Hanging Seedling Rain Chains

This idea involves building a hanging seedling rain chain at hometalk with recycled soda bottles. The half cut water bottles are designed to hold the soil and the seedlings and get sufficient water for the crops.

This project is very economical as you can get all the required materials and tools within your home. Following this plan, you can complete the project in a few hours.

hanging seedling rain chain
Image via: hometalk

3. Garden Decor Cookie Cutter Rain Chain

For you to have a successful garden in your backyard, you need to water your crops continually. Building a rain chain like this one by newhousenewhomenewlife is one way to get enough water for your tender plants.  This idea involves making a rain chain with cookie cutters, to direct water to the garden or collect water for garden use.

The rain chain will be hanged on the roof, and the water directed to the flower pot or a waiting bowl, to later use to water plants. You may also like to see diy rain barrel.

Garden Decor Cookie Cutter Rain Chain
Image via: newhousenewhomenewlife.com

4. Modern Rain Chain

There are so many advantages of a rain chain, and so many reasons to build one; one of it been that divert water from your building. These splashing waters can affect the foundation of your building as well as the painting.

This is a modern rain chain idea by makezine made from copper cups lined across a chain. You can also use it to direct the water down to a big barrel, to store water for later use on your garden or lawn. You may also like to see rain gutter ideas.

modern rain chain idea
Image via: makezine

5. Rain Chain Using Spoons

The rain chain is quite popular in Asia, where it has been used for years to channel water from the roof to the ground; you can make one for your home following this detailed plan which involves building a DIY rain chain by birdsandblooms using old spoons. It’s a fun project that can be beneficial to your home.

It’s advisable to use thinner spoons, so you can easily bend them. You can place a decorative pot or barrel under the rain chain to collect the water.

Rain Chain Using Spoons
Image via: birdsandblooms

6. Rain Chain from Galvanized Steel Buckets

Rain gutter chains are a perfect alternative to downspouts and can direct rain from your gutter to the ground. They are also amazingly easy to make and requires little supplies.

This idea involves making downspout rain chains like this one by curbly with galvanized steel buckets and chains.

Have it in mind that the length of the chain and number of buckets required will be determined by the length of your house to the ground.

Rain Chain from Galvanized Steel Buckets
Image via: curbly

7. Rain Chain from Wire-Wrapped Rock

Building a rain chain is the ideal fun project to carry out with the kids during the weekend. And you don’t need to spend so much on materials. These downspout rain chains by dollarstorecrafts are made with wire wrapped around rocks.

The rocks are placed and held in between the floral wire. The rain chain can be crafted within a few hours and costs less than ten bucks.  You can use it to channel water to the garden or a flower pots.

Rain Chain from Wire-Wrapped Rock
Image via: dollarstorecrafts

8. DIY Slag Glass Rain Chain!

Making a rain chain like this one by victoryordeathinthegarden ranks amongst one of the best outdoor decorations; It’s sure always to catch the attention of anyone coming towards it; Making your home look beautiful while providing functionality.

This plan involves making an elegant rain chain with gauge wire and slag glass. The cable will be tightly wrapped around several slag glasses according to the length of your building.

DIY Slag Glass Rain Chain
Image via: victoryordeathinthegarden

9. Rain Chain from Aluminum Funnels

The rain chain is a pleasing water feature which has long been popular in Japan and is beginning to trend in the USA. Tame the rain with this budget rain chain like this one by motherearthliving which is a perfect replacement for gutter downspouts. This project is a lot of fun to make and is inexpensive. Its made with aluminum funnels, held by galvanized chains. You need to determine the height of the building so that you can know the length of string and the number of funnels required. You may also like to see rain garden plants.

Rain Chain from Aluminum Funnels
Image via: motherearthliving

10. Rain Chain from Copper Pipe

Buying an already made rain chain is quite expensive. You can confirm that from the store or with s simple Google search. It’s even more costly if it’s made of copper.

However, following a DIY plan, you can make a copper rain chain like this one by hometalk within a few hours for far less Cost. The project involves using a flexible copper pipe of a considerable length to make the chain, which you can then hang on the roof to channel water outpour.

Rain Chain from Copper Pipe
Image via: hometalk

11. Oui Yogurt Jar Rain Chain

Yoghurts are so yummy and eating it out of the cute little jar will most likely make anyone feel like a fancy French lady. Now, Instead of just wasting those little jars; embark on a fun project and use them to create a rain gutter chain like this one by huntandhost. The idea is pretty simple, and the project can be completed in a few hours with just a few tools.

Oui Yogurt Jar Rain Chain
Image via: huntandhost

12. Mini Flower Pot Rain Chain

A rain chain is like jewelry for your home. It’s very popular in Asia and has been used for years to gracefully control the path of water away from the walls or into barrels. This plan involves making a DIY rain chain by cutoutandkeep with small flower pots, held with string. The project is straightforward, even for a first time DIYer, it can be completed under 2 hours and cost very little.

Mini Flower Pot Rain Chain
Image via: cutoutandkeep

13. Copper Rain Chain Succulent Planter

Many people wants to see rain chains as an alternative to regular downspouts, as they work just as well. However, it offers more than that; with the needed materials, and following this plan, you can make a functional rain chain like this one by twothirtyfivedesigns which can also be utilized as a succulent planter. The rain chain is made of copper, which makes it even more beautiful. The project will only take two hours to complete and requires just a few supplies.

Copper Rain Chain Succulent Planter
Image via: twothirtyfivedesigns

14. Rain Chain With Copper Fork and Spoon

Spring rains are a rare gift in most of the country. You can take advantage of the precipitation, by making a rain chain to ensure the runoff isn’t wasted or even splashing down on your foundation.

The DIY idea involves making a rain chain by imgoingtotexas with forks and spoons, which are twisted into exciting shapes and joined at the tips to create the long downward chain. The project will turn out to be decorative and very functional.

Rain Chain With Copper Fork and Spoon
Image via: imgoingtotexas

15. Front Door Driftwood Garland

Need something different from copper and much more inexpensive? Then you should make this farmhouse-inspired rain chain by cityfarmhouse made of driftwood

The project also serves as décor, while even controlling the motion of water. You need to get driftwoods in large quantity and also ensure the driftwoods are the same length so that it will look nice. The woods are held together with twine.

Front Door Driftwood Garland
Image via: cityfarmhouse

16. Rain Chain Using Shower Curtain Hooks

DIY is always about creativity and using less costly methods to achieve excellent results, and this rain chain by greneauxgardens.blogspot made with shower curtain and hooks perfectly depict that.

It provides a creative, beautiful and inexpensive way to get water from the downspout into a barrel or a plant pot.

Shower hooks make great rain chains as they are metal and heavy, which means they can’t be blown by the wind. Also, they are intended for the shower, which also rules out the possibility of rusting.

Rain Chain Using Shower Curtain Hooks
Image via: greneauxgardens.blogspot

17. DIY Tart Tins Rain Chain & Suncatcher

Rain chain makes excellent decoration, and they also provide functionality. This DIY rain chain by wingsofwhimsy can be created with tart tins and anything you have that can survive the outdoor, especially beads. The tart tins are held with a solid wire and beads can be added between each tart tin.

You will be happy with the result, as it will it be beautiful, and functional.

DIY Tart Tins Rain Chain & Suncatcher
Image via: wingsofwhimsy

18. Neon Zip Tie Rain Chain

This is another fun DIY project to embark with the family. It involves making a rain chain like this one by dollarstorecrafts out of Neon Zip ties and wooden beads. You will make loops from the large zip ties and attach them to one another.

This provides a beautiful alternative to downspouts and helps correctly guide the rain from the roof, away from your home’s foundation. The water can be channeled into a barrel or just to the ground.

Neon Zip Tie Rain Chain
Image via: dollarstorecrafts

19. Hanging Yogurt Cup Waterfall

This project involves using some yogurt cups and bakers twine to create a functional rain chain like this one by childhoodlist.blogspot to channel the movement of water off your roof. The twine is used to tie the cups together, and it’s then hanged in the right spot on the roof.

This project is straightforward to make and requires no prior experience. You need to know how to tie a knot to do this.

Hanging Yogurt Cup Waterfall
   Image via: childhoodlist.blogspot

20. Plastic Cup Rain Chain

If you still haven’t chosen a DIY rain chain like this one by dollarstorecrafts to make, then this plan which involves creating one with plastic cups will be ideal. The plastic cup will be held by a chain through the middle. You can use various colors of plastic cups to make it more beautiful.

This project is inexpensive and can be completed within a few hours. You need a few tools to couple the whole components.

Plastic Cup Rain Chain
Image via: dollarstorecrafts

21. Rain Chain From Copper

Copper made rain chains like this one by myhomemystyle tend to give a peaceful trickling sound, as they catch the water and gently spills it to prevent erosion. They are quite costly when you want to buy from the store. However, following this DIY plan, you can make an affordable copper rain chain for your home. The project is easy to set up, and you only need a few materials.

Rain Chain From Copper
Image via: myhomemystyle

22. Copper Wire And Polished Stones Rain Chains

Add Style Outdoors with by making this rain chain. This rain chain at quora is made with copper wire and polished stones. The wire is wrapped around each rock to hold it and then joined with copper strings. You can hang the chain to the gutter and place a bowl underneath to collect the water.

Copper Wire And Polished Stones Rain Chains
Image via: quora

23. Little Watering Cans Rain Chain

You will be surprised with the outcome if you price a rain chain in a store; some of the least costly goes for around $80 to $100. Howbeit, you can follow a DIY plan to build this beautiful rain chain by isavea2z for less than $15.

The project is done with tiny garden watering Cans and metal chain. You can use different colors of the cup to make it look more beautiful.

Little Watering Cans Rain Chain
Image via: isavea2z.com

24. Recycled Soda Bottles as Hanging Seedling Rain Chains

DIY rain chains are fun things to build with the family, and it only gets better when you won’t have to spend a dime on it. This is another garden planter rain chain idea by hometalk. Its made with soda bottles and straws, which you should probably have in your home. You can make this project to grow seedlings in your home.  It is very simple to make and doesn’t take long.

Recycled Soda Bottles as Hanging Seedling Rain Chains
Image via: hometalk

25. Rain Chain Using Vintage Tarte Tins

If you are searching for an elegant modern rain chain like this one by lifeawayfromtheofficechair to make, then this DIY project will be ideal. The project involves constructing a rain chain with vintage tart tins, and metal chains. The plan is straightforward to build and cost below $20.

Rain Chain Using Vintage Tarte Tins
Image via : lifeawayfromtheofficechair.com

Conclusion

Rain chains are a beautiful, creative and functional replacement for gutter downspouts. Listed above are some beautiful and inexpensive rain chains you can make for your home.

 21 Fun DIY Bean Bags And Chairs You Will Love To Make

DIY bean bags can be part of game-time fun and comfortable DIY chairs made with colorful fabric can be used in any room of the home. Cover bean bag chairs with weather resistant canvas made for exterior furniture and enjoy the chairs outside while taking a break from game-playing.

Check out these 21 fun DIY bean bags and chairs and get started making your favorites this weekend.

You may also like to check out other gaming and fun projects such as DIY cornhole boards, diy gaming tablesdiy puzzle tables, diy climbing walls and diy lemon stands.

  1. DIY Small Bean Bags

Several outdoor games need small bean bags in order to play. These instructions will show you how to make bean bags so that you will always have some on hand for playing corn hole or juggling.  It’s a simple sewing project that will enable you to use up small scraps of fabric that you have on hand.

DIY Small Bean Bags

  1. Juggling Chooks DIY Bean Bags

Fun to make and fun to play with! Great for a child’s birthday party, the instructions for these juggling chooks create bean bags that look like little chickens. This is a simple sewing project and would be a great way to teach a child how to sew. These small DIY bean bags can be made in bright colors and given various animal faces with this easy to follow pattern.

juggling Chooks DIY Bean Bags
diy bean bag image via: redtedart.com
  1. Football DIY Bean Bag Chair

Show your team spirit by making this large bean bag chair with a football design. This easy to follow pattern will show you how to create this football chair without sewing a stitch. The fabric and ribbon are glued into place with fabric glue. Make a soccer ball or baseball chair with this idea.

Football DIY Bean Bag Chair

  1. T-Shirt DIY Bean Bag Chair

Create a giant bean bag chair and cover it with those old favorite T-shirts you just could not get rid of. A great way to memorialize old sports teams your children use to play on or to create a reminder of concerts attended in the past. The giant bean bag chair will be personal and unique.

T-Shirt DIY Bean Bag Chair

  1. Educational DIY Bean Bags

These are DIY cornhole bags with a twist — they are for education as well as fun. Use these instructions to make the small bean bags, then create numbers or letters on them to help your child learn during playtime. An easy way to make learning fun for little ones.

Educational DIY Bean Bags

  1. DIY Cornhole Bean Bags

The popular and fun game of cornhole needs new bags far more often than the cornhole board needs to be replaced. Learn how to make cornhole bags with these easy to follow instructions so you can keep the game time fun going until the wooden board wears out. You may also like to check out 17 Ideas for diy corhole boards.

DIY Cornhole BagsDIY Cornhole Bags

  1. DIY Bean Bag Chair for Two

These step by step instruction will show you how to make a bean bag chair that is large enough for two people. Great for a shared bedroom or apartment. Easy to make, easy to move, this large bean bag chair is inexpensive and can be covered in your choice of fabric to coordinate with any room in your home.

DIY Bean Bag Chair for Two

  1. No Sew DIY Bean Bag Chair

This DIY bean bag chair required no sewing skills to create. The high back and wide bottom make it comfortable for young and old alike. Curl up in this comfortable chair with a good book and an afternoon nap. Your choice of fabrics will create a fashionable no-sew chair for any room.

No Sew DIY Bean Bag Chair

  1. No Sew DIY Bean Bags

Use these simple instructions to create DIY bean bags without sewing a stitch. A hot glue gun seals the felt fabric closed and creates a soft, colorful covering for the small bean bags. Perfect for use in several games or you can glue numbers or letters on the felt and use for learning time.

No Sew DIY Bean Bags

  1. Bunny Burrow Game

Here is a fun game with a tongue twisting name – Bunnies in Burrows Bean Bag Game. You can create the small bean bags and learn how to play this fun game with the instructions provided on the web page. Cute little Bunny Bags make soft toys for children too.

Bunny Burrow Game

  1. Kids Bean Bag Chair

This is a very simple DIY bean bag chair for kids. Child sized, comfy and sturdy, this bean bag chair will be a favorite seat for a child until they outgrow it. Beginners sewing skills are required to create this kids chair, but this instructional video will walk you through the process with confidence.

Kids Bean Bag Chair

  1. Baby DIY Bean Bag Chair

A soft place for Baby to rest, this small bean bag chair has straps that will prevent baby from rolling off the chair. Small and lightweight, easy to carry along with you. Easy to follow instructions are on a down-loadable PDF file. Remove straps when Baby reached toddler stage.

Baby DIY Bean Bag Chair

  1. Juggling DIY Bean Bags

Fun for all ages, create juggling diy bean bags with these free instructions. Use colorful fabric to create these juggling bags and everyone will be as amazed with your DIY skills as they are with your juggling ability. Beginners sewing skills are required to make these small bean bags.

DIY Juggling Bags

  1. Sock DIY Bean Bags

Get creative and bring out your colorful side with these no-sew sock diy bean bags that can be used for a variety of games. I-Spy is always fun for toddlers, while juggling and cornhole is fun for older kids and adults. Create these no-sew sock bean bags in minutes for hours of fun.

Sock DIY Bean Bag

  1. Hamburger DIY Bean Bag Chair

Create this fun DIY bean bag chair that looks like a giant hamburger. Fun style for kids and makes a great conversation starter for all ages. So comfortable, you may have to make an extra one for the family pet. Great to create for birthday or Christmas gifts.

DIY Hamburger Bean Bag Chair

  1. DIY Giant Bean Bag Chair

This tutorial will show you how to create a comfortable chair that is 50 inches in diameter and 28 inches tall. So much fun for a child to snuggle up in with a snack and a good book. The large size also makes it a great place to take a nap or for use as an extra child’s bed.

DIY Giant Bean Bag Chair

  1. Therapeutic DIY Bean Bags

Small diy bean bags can be used for much more than just playing games, they also have therapeutic uses. The small bags filled with beans or rice make an excellent pain reliever when heated in the microwave and placed on aching joints. The warm bags are also prefect for warming cold feet.

Therapeutic DIY Bean Bags

  1. Easy DIY Bean Bag Chair

It doesn’t get any easier than this pattern when it comes to creating a comfortable and affordable diy bean bag chair. The high back makes it a comfortable seat to snuggle with Baby, so you might want to make one for the nursery and one for the family room. Colorful fabric makes the chair inviting and fun to sit in.

Easy DIY Bean Bag Chair

  1. 30 Minute DIY Bean Bag Chair

This fun kids bean bag chair can be created in just 30 minutes. The wide bottom and low back make this a fun place to lounge and a colorful fabric choice will make it the most popular seat in the house.

Beginners sewing skills and 30 minutes of work will create this comfortable chair.

30 Minute DIY Bean Bag Chair

  1. Animal DIY Bean Bags

Here is a great way to teach kids about nature — create different diy bean bag animals for them to play with. Colorful, soft frogs, turtles and owls will provide kids with hours of educational fun. The patterns for the animals can be downloaded and are easy to follow.

Animal DIY Bean Bags

  1.  Balloon DIY Bean Bags

Use these instructions to create balloon diy bean bags that are tough and durable. The round shape makes them great for a variety of games. A great way to use up leftover balloons from birthday parties. Easy to makes with these step by step instructions.

DIY Balloon Bean Bags

23 Popular Heirloom Tomatoes To Grow For Rich Taste And Diverse Colors

Heirloom seeds are the best way to preserve the flavor of history. Each one of us grew up with certain types of vegetables that we would like to enjoy as adults and pass down to our children. The simplest way to do that is to grow out own vegetable favorites so we always have them on hand.

Heirloom tomatoes is a good example of passing down a flavor heritage through garden vegetables. These tomatoes seeds are passed down through the generations, making it possible for use to enjoy the same tomato variety and flavor that our grandparents enjoyed.

Through a simple homegrown tomato we are able to preserve a little bit of our heritage, grow the best tasting tomatoes and keep our home garden produce free of any GMO food items.

All tomatoes are a major dietary source of the antioxidant lycopene, which has been linked to many health benefits, including reduced risk of heart disease and cancer. They are also a great source of vitamin C, potassium, folate and vitamin K.

Check out these 23 popular heirloom tomatoes and plant some in your home garden for GMO-free rich taste and diverse colors. Heirloom tomatoes seeds can be purchased through a seed exchange.

  1. Anna Russian

Small, heart shaped red tomato that has a dual flavor of both tartness ad sweetness. Originally from Russia, this heirloom tomato was handed down by Russian immigrants living in Oregon in the early 1980‘s. This heirloom tomato variety grows in clusters of three and ripens early in the spring. The vines are unsightly and straggly and will need to be supported, but vines produce prolifically all summer.

Anna Russian tomatoes

  1. Azoychka

This is a very tart tasting, yellow tomato that is originally from Russia. Robust, sturdy plants grow well in cool climates and poor soil. The inside flesh is white and it makes a nice slicing tomato that ripens in early spring. If the tart flavor is too much for eating as a slicing tomato, try Azoychkas in a tangy salsa recipe for flavor and color. Also great for use in fresh chow-chow or for pickling.

Azoychka tomatoes

  1. Brandywine

Pink, yellow, orange, black or red slicing tomato that is filled with flavor. Somewhat fickle to grow, Brandywine will produce abundantly when grown in full sun and well draining, fertile soil. If this tomato is not happy in its growing location, it won’t produce. Amend garden soil with compost to promote drainage and increase fertility before planting Brandywine plants. Use more compost as a side dressing or as a mulch to keep the plant well fed during the growing season.

Brandywine has remained a popular tomato variety for its flavor, color and texture.

Brandywine pink tomatoes

  1. Black Beauty

The blackest of all tomato varieties, shiny black skin with red skin makes this variety a knock-out when sliced. Meaty, rich flavor, few seeds and thin skin. Hangs well on the vine and stores very well, and the flavor improves with room-temperature storage.

This tomato is rich in anthocyanin, which is the same antioxidant found in blueberries and blackberries. Anthocyanins offer anti-inflammatory, anti-viral, and anti-cancer benefits, so not only is the Black beauty beautiful and tasty, eating them provides a myriad of health benefits.

Black Beauty Tomatoes

  1. Black Krim

A heirloom variety from the Black Sea region of Russia. High yields of fruits have a rich tomato flavor and turn to reddish black when mature. Interior is reddish green and very sweet. Excellent for salads and sandwiches.

Plant in full sun and well draining soil. Keep soil consistently moist throughout the growing season. Add a side dressing of compost to provide a constant food source for high yielding plants.

Black Krim Tomatoes

  1. Big Rainbow

The yellow flesh inside this heirloom fruit is marbled with red in the bottom half. Tomatoes have a big, lumpy beefsteak shape with a very mild and sweet flavor. Fruits typically reach 22 ounces and make an attractive addition to any table when sliced and placed on a platter.

Tall plants grow best in full sun and well draining soil. Plants will need to be staked and tied. Amend soil with compost prior to planting to promote drainage and increase fertility. Add a side dressing of compost mid-way through the growing season to provide a steady supply of food for the plant.

Big Rainbow Tomatoes

  1. Cherokee Chocolate

Large heirloom tomato that is dark brown with tinges of green color when ripe. The names comes from the skin color, not the flavor. The more fertile the soil, the larger the fruits the plant will produce. It’s not uncommon for Cherokee Chocolates to reach the size of grapefruits if the soil is amended each year and has good drainage.

This is a happy heirloom tomato plant that will grow well in any home garden that receives 6-8 hours of sun each day.

Cherokee Chocolate

  1. Cherokee Purple

As the name suggests, this heritage tomato has purple tinted skin. Originating from Tennessee, Cherokee Purple tomatoes have been passed down to us from Native Americans of the Cherokee tribe. This purple skinned tomato has a full, rich flavor and its large size makes it perfect for slicing and placing on a sandwich. Easy to grow in full sun and well draining soil.

Cherokee Purple Tomatoes

  1. Cherokee Green

Large, tomato with green skin and flesh. Tart taste and sturdy flesh makes them a good tomato for frying. This tomato variety is a late starter, but will continue to produce fruits until first frost.

Disease resistant, grows well in cooler climates. Harvest all remaining tomatoes prior to first fall frost and use to make green tomato pickles.

Cherokee Green Tomatoes

  1. Dwarf Emerald Giant

This heirloom tomato variety produces full sized tomatoes on small plants. Dwarf Emerald Giant originated in Australia from a cross between Golden Dwarf Champion, which is a medium sized fruited yellow dwarf, and Green Giant tomato. Fruits range in weight from half a pound to a pound. Plants are small and sturdy, making it a perfect choice for growing in a container or a small garden.

Dwarf Emerald Giant

  1. Ferris Wheel

This super sweet tomato has been around since at least the late 1800‘s. It’s very popular today for its consistently large size, smooth, unblemished skin and sweet flavor. Fruits have been known to reach up to 3 pounds, but sometimes ripen when only half a pound. Typical mature size is one pound.

Amend soil with compost prior to planting to promote drainage and increase fertility. Add a side dressing of compost mid-way through the growing season to provide a steady supply of food for the plant.

Ferris Wheel Tomatoes

  1. Green Giant

The name aptly describes this large tomatoes with green flesh. This tomato is meaty with a small seed cavity. Ripens in late summer and can be harvested when flesh has a slight give when pressed with finger.

Select a planting location in full sun. Amend soil with compost prior to planting to promote drainage and increase fertility. Add a side dressing of compost mid-way through the growing season to provide a steady supply of food for the plant.

Green Giant Tomatoes

  1. Kellogg’s Breakfast

The name suggests a breakfast food, but this is the best heirloom tomato variety for sandwiches. Full of flavor, but very little juice so it won’t make sandwich read soggy. Plant in full sun and well draining soil and each plant will produce about 7 large yellow tomatoes.

Kellogg’s Breakfast Tomatoes

  1. Lillian’s Yellow Heirloom

Yellow, meaty and dense tomato with thin skin. This tomato plant produces large yellow tomatoes that weight 10-16 ounces in late summer, taking close to 100 days to reach maturity. It contains very few seeds, making it great for slicing.

Lillian’s Yellow Heirloom

  1. Lucky Cross

A delicious cross of sweet and sour, red and yellow. A happy accident of a plant that just grew in among the Brandywine plants and produced a beautiful, flavor-filled tomato. Plants grow very tall and will require staking to keep upright.

Lucky Cross Tomatoes

  1. Mexican Midget

Heirloom cherry tomatoes that are small in size but have a big flavor. This cherry tomato won the 2014 SSE’s Tomato Tasting Contest. Easy care plant needs full sun and well draining soil to produce hundreds of small fruits throughout the summer gardening season.

Mexican Midget

  1. Mr. Stripey

The stripes are not perfect, but the flavor always is. These huge, beefsteak-type red-and yellow fruits with a high sugar content are delicious and pretty to slice because of the bi-coloring. Weighing up to two pound each, Mr. Stripey heirloom tomatoes have always been popular in the southern states. This variety grows best in regions with long, hot summers. Plants reach up to 10 feet and produce fruits all summer.

Mr. Stripey Tomato

  1. Speckled Roman

Tiger striped oblong tomato is great for slicing, dicing or sauces. This heirloom is a cross between and Antique Roman and Banana Legs tomatoes. Gorgeous 5 inch long fruits contains very few seeds and the plant produces fruit all summer when planted in a sunny location.

Speckled Roman Tomato

  1. Mortgage Lifter

This is a large, delicious heirloom tomato with a prosperous financial history. It was originally developed by a man in West Virginia to pay off his home mortgage. The cross- breeding was successful and the plants produced fruits that weight up to two pounds. Seedling of the Mortgage Lifter were sold and the West Virginia tomato breeder was soon mortgage-free.

Mortgage Lifter Tomato

  1. Nepal

This tomato variety originates in the Himalayas, making it a great heirloom fruit to grow in cooler climates. Medium sized red tomatoes are quick to ripen and full of flavor. Vines reach 6-8 feet tall and will need to be supported. Plant in a location that receives 4-6 hours of sun daily.

Nepal tomato

  1. Sun Gold

Big -growing plant produces small yellow tomatoes that have a big flavor. Vine can grow up to 10 feet and will need to be supported to keep the hundreds of yellow cherry Sun Gold tomatoes off the ground. Plant in full sun and harvest hundreds of sweet yellow heirloom cherry tomatoes all summer.

Sun Gold Tomato

  1. Super Beefsteak

Most all garden supply centers sell beefsteak tomato plants. They remain a popular variety of tomato due to their consistent large size. The Super Beefsteak is the true heritage tomato and regularly produces fruits over one pound. This heirloom variety also has smoother skin and smaller blossom end scars.

Flavorful red tomato is easy to grow in home gardens – just give plant a sunny location, fertile soil and consistent moisture and it will reward you with summer long production.

Super Beefsteak Tomatoes

  1. Rosella Purple

The deep, dark red skin color is almost purple and the flavor is rich and full. The plant is sturdy and compact, making it an excellent choice for growing in a container. Fruits are round and can weigh up to one pound. Rosella Purple originated from a cross between Budai, a small red fruited dwarf, and Stump of the World, a popular variety from Australia.

Easy to grow, plant in good quality potting soil, feed bi-weekly with a water soluble fertilizer and place container in full sun.

Rosella Purple

Tomato Nutrition

Tomatoes are low in sodium, saturated fat and cholesterol and contains about 20 calories.

The fruit’s biggest health benefits are:

  • Vitamin C: An essential nutrient and antioxidant. One medium sized tomato can provide about 28% of the recommended daily intake.
  • Potassium: An essential mineral, beneficial for blood pressure control and cardiovascular disease prevention.
  • Vitamin K1: Also known as phylloquinone, vitamin K is important for blood coagulation and bone health.
  • Folate (B9): One of the B-vitamins, important for normal tissue growth and cell function (6). It is particularly important for pregnant women.
  • Lycopene : An antioxidant that has been shown to reduce prostate cancer. Additionally, lycopene can increase HDL (healthy cholesterol) and reduce LDL (bad cholesterol).

They are also good sources of Vitamin E, Vitamin B6,Thiamin, Niacin, Magnesium, Phosphorus, Copper, Vitamin A, Vitamin K, Manganese and a good source of dietary fiber.

Nutritional and health benefits can be derived from fresh, canned or dried tomatoes.

16 Free Ramp Plans-Learn How To Build Various Ramps

Making a ramp tops is one of the best DIY projects you can execute and there are various types of ramp plans you can create to improve functionality within your home, we have compiled 16 free easy to build DIY ramps plans to make your home more attractive and accessible. There are steps to guide you on how to build a ramp to enable you to get underneath your car quickly, a wheelchair ramp or shed ramp for more accessibility to and a skateboard ramps to provide a fun-filled skateboarding experience right in your home.

Here are the standard supplies and tools used in these projects.

Basic supplies required

  • Pressure treated wood boards – you can find these in hardware stores.
  • Plywood
  • Beam joist
  • Metal sheet – you can get this from home depots, or search the internet for steel fabricators.
  • Screws – from home improvement stores.
  • Metal handles – from home improvement stores.
  • Roofing nails
  • Shims
  • Pines
  • Adhesive

Basic tools

If you have the budget, you can buy most of these tools, as you would be using them for other diy projects. Otherwise, lookout for where you can borrow some of these.

  • Miter saw
  • Level and framing nailer
  • Power drill
  • Measurement tape
  • Triangular ruler
  • Philip-head
  • Belt sander
  • Masonry Bit
  • Hand file.
  • Pencil for marking.

Wheelchair Ramp Plans

1. Build a Wheelchair Ramp

Building a wheelchair ramp like this one by familyhandyman would be a fantastic project to carry out. This ramp can go a long way in helping someone with mobility challenges live independently and can be made of wood or all aluminum.

You can get already formed ramp material (wooden or Prefabricated aluminum), and then assemble it yourself.

When making this ramp, you need first to create a sketch of your ramp considering the measure of the width, landing size and location. Measure the distance between the thresholds to the ground and adjust the length and slope of the ramp to fit your yard. Then start building

Build a Wheelchair Ramp
How to Build a Wheelchair Ramp, Image via: familyhandyman

2. Build a Portable Wheelchair Ramp

Moving a wheelchair into homes, vehicles and shops could be hectic as the entrance might be steep. A portable wheelchair ramp like this one by instructables by becomes the ideal solution to ease movement in and out of these places.

Custom made aluminum ramp are good, but are quite expensive and most of them may not work correctly for all kinds of wheelchairs, as they are mainly made for lighter wheelchairs, and are not very strong.

When building these wheelchair ramp plans, always bear in mind the measurements of the available space. You can attach handles to the ramp for comfortable carriage.

Build a Portable Wheelchair Ramp
Moveable wheelchair ramp plans,, Image via: instructables

3. Make a Handicap Ramp and Landing

Make your home easily accessible to people with movement challenges with this classic DIY project. Handicap ramps like this one by hgtv are easy to create and a great DIY project to embark on. First, you have to measure your space and then sketch your ramp design.  “The Americans-with Disabilities-Act requires that ramps such as this should be at least 5fts by 5fts, so someone in a wheelchair can quickly turn around without getting stuck).

Assemble each piece of wood using a framing nailer.

Check to ensure the frame is sturdy, then add a few pressure treated wood shims in areas where needed, before attaching the structure to the building with nails.

Create support for the diy ramp, by cutting woods that measure from the top of the landing to the concrete base and nailing them to the side of the ramp.

Make a Handicap Ramp and Landing
Make a Handicap Ramp and Landing, Image via: hgtv

4. Wheelchair Ramp Plan 

Another wheelchair ramp idea, to improve home accessibility for people who can’t use the stairs. This wheelchair ramp plan by lowes provides a gentler and less stressful way of entering or leaving their home for them.

This is amongst the most straightforward DIY projects you can start right away. However, you might want to ensure building a wheelchair ramp complies with local building requirements and its created to meet the specific needs of the occupant. The diy wheelchair ramp should be formed according to the measurement of the entrance point of the home.

To make it safe and sturdy, hardwood is used and its coated with stain to ensure durability.

Build a Wheelchair Ramp
building a wheelchair ramp,, Image via: lowes

Car Ramp Plans

5. Make a Car Ramp For Your Vehicle

It’s always fun doing things the DIY way, Instead of using hydraulic jacks, build a DIY car ramps like this one by corvetteforum to access underneath your vehicle. The design of this diy ramp is very straightforward.

First, cut the wood to the required dimension and get the fillets done and edge sloped. Get the plank smoothened (using a hand planer); you can take it to a carpenter to do this.

Next, attach the planks to each other by applying the adhesive at the base of each plank and then stacking them one above the other.

Mark the points to drill and drill at that point ensuring the planks don’t move. After that, you can then use a Philip-head to screw it together.

Check that the end of the screw doesn’t jut out at the bottom. Use a hand file to file out any jutting screw.

Make a Car Ramp For Your Vehicle
Make a Car Ramp For Your Vehicle, Image via: corvetteforum

6. Build A Diy Car Ramp To View Underneath Your Vehicle

We have all had that moment when we want to get the car up in the air and access or fix something under it. Well, these easy to build ramp plans by team-bhp give you an inexpensive and easy way to achieve that.

First, create a framework of the ramp using the planks, the length of the ramp can either be 2”x10” or 2”x12”. Screw the planks to each other with screws to create the frame.

Then cut each plywood to a width of 3 strips 16”, and then screw to attach to the various sides of the ramp. The ramps take a sheet each. There you have it.

Build A Diy Car Ramp To View Underneath Your Vehicle
Build A Diy Car Ramp To View Underneath Your Vehicle, Image via: bhp

7. Have A Low Profile Car? – Build A Car Ramp To Fit Your Vehicle

Low car ramps cost as much as $200, but with this Diy hack, you could build very sturdy DIY car ramp like this one by golfmkv for a quarter of that.

Sketch the slope; this would make it easier to build.

Using the saw, cut the wood according to the measurement, this should depend on the length of your car. A 90” size was used here.

Then assemble the wood one after the other with a screw, You can then attach caster wheels to simplify moving the ramp and sand the edges to provide extra refinement.

Have A Low Profile Car? – Build A Car Ramp To Fit Your Vehicle
Build A Car Ramp To Fit Your Vehicle, Image via: golfmkv

8. Create A Customized Low DIY Car Ramp 

Another diy ramp plan by instructables for those with low cars. You might end up having an issue if the cowling under your car’s bumper touches the ramp. Make this customized low day diy car ramp to keep your vehicle in good shape.  A little innovation was introduced in this project and its aimed to help indicate to you when to stop moving when climbing the ramp. So, a small switch connected to a bulb was attached to the close to the end of one of the ramp, in a way that when climbed on, the build start lightening and you would know to stop.

Create A Low Customized Low Car Ramp
Create A Customized Low DIY Car Ramp , Image via: instructables

Skateboard Ramp Plans

9. Build A Skateboard Quarter Pipe Ramp

If you love skateboarding, then quarter pipe skateboard ramps such as this one by liveabout is a must have. You can also use it for bikes, and it isn’t hard to build. Having a skating ramp at home is excellent as it provides you with an alternative when it’s raining or when you want to skate alone.

Building a 3 inches quarter pipe ramp is not so difficult or time-consuming, and it cost less than a 100 bucks. That’s less pay compared to the fun it would provide.

It’s going to require some of the necessary materials for this project, In addition to those listed at the top; you would need a metal pipe (you can quickly get one from a home improvement shop).

Build A Skateboard Quarter Pipe Ramp
Build A Skateboard Quarter Pipe Ramp, Image via: liveabout

10. Make A Skateboard Mini Ramp

Another skateboarding DIY project for enthusiasts. Whether you are an experienced skateboarder, just starting out or have got kids who love skating, this DIY mini ramp plan by wikihow is the ideal project to provide fun and satisfying experience. Have the time and space to practice till you become a good skateboarder.

Before embarking on this project, check the possibility of storage, whether you have enough space for it in your home would help you determine the size.

To start, get your ideas on paper and create a blueprint for your design. Then organise the needed supplies and then begin to build.

Make A Skateboard Ramp
Make A Skateboard Mini Ramp, Image via: m.wikihow.com

11. Build A Micro Quarter Pipe Ramp

Skating never gets old; if you still haven’t found the ideal skating DIY project, these micro quarter mini ramp plans by howtheyplay would be suitable for you. Size and mobility are crucial factors to consider when building your diy ramp; this particular project would fit any home due to its variance in size.

You can also create the micro-ramp indoors, to protect the elements. However, When built outside, you can use pressure treated woods and paint to ensure longevity.

Apart from the primary materials, you can get others from home improvement stores. First, gather your tools, design your ramp and start building.

Build A Micro Quarter Pipe Ramp
Build A Micro Quarter Pipe Ramp, Image via: howtheyplay

Shed Ramp Plans

12. Build a Shed Ramp For Your Home

A shed ramp like this one by thesawguy adds so much functionality to your home; it eases the movement of things in and out through the door. You might have challenges moving the wheelbarrow, mower or the dolly in or out of the house, but building a shed ramp within a few hours can make life far more comfortable for you.

A shed ramp is a basic necessity in all home, while some sheds are permanently attached, shed ramp plans like this are made to be detachable, so you only get to put it in place when you need to use it.

It’s important that you measure the height from the ground to the base of your door and build the shed accordingly.

You may also like to see diy pallet shed and garden shed plan.

Build a Shed Ramp For Your Home
Build a Shed Ramp For Your Home, Image via: thesawguy

13. Make A Garage Shed Ramp

Want a ramp to enable you quickly walk into your garage, or move equipment like the lawn mower or even ride the motorcycle out? Then this is the ideal DIY ramp by instructables for you.

Building a shed ramp yourself gives you the opportunity to make it very sturdy.

Firstly measure the height from the garage floor to the ground, in this case, it was 14”, so the front side of the diy ramp was built to be 14” high.

As usual, its best you start with a sketch of the ramp, then source for materials before you begin building,

Make A Garage Shed Ramp

14. Make A Backyard Shed Ramp

A shed ramp can come very handy in the yard if you use a cart, or want to access specific areas, and in this DIY wood project, you would be learning how to build a shed ramp like this one by howtospecialist very quickly, no matter your experience .

The good thing about this DIY project is that you would create the ramp, how you want it and suit your need.

From the design to the length and width, everything should be about the space you have out there.

First, you would have to source materials, in addition to those listed at the top, you can also get a wood stain and paint optionally.

Make A Backyard Shed Ramp
Shed ramp plans image credit: howtospecialist.com

Deck and Launch Ramp Plans

15. Build a Deck Access Ramp

Make your deck more accessible by building and installing a deck ramp like this one by bhg. You can design it to be either an angle deck or flat stairs all according to the space you have. You can also have a building inspector look over your plan before you start constructing.

Get the necessary materials and create the deck ramp according to instructions, then place it in a way that’s convenient and offers unrestricted access to the deck.

Build a Deck Access Ramp
Build a Deck Access Ramp, Image via: bhg

16. Make a Launch Ramp

There is so much fun from a launch ramp to pass up.

If you aren’t conversant with using a launch ramp, it’s quite easy to learn. Find out how to build a ramp of any size you want.

These are mainly some of the best ramp ideas out there, go through the list and choose those that fit your need and that of your home and start working on it.

Make a Launch Ramp
Make a Launch Ramp

8 Homemade Wasp Traps To Get Rid Of Wasps

The trend of homemade wasp trap is growing at a high pace in the recent times, as more and more people are opting to use them instead of buying a wasp trap. The homemade wasp trap can be highly effective in getting rid of the wasps, as you can simply choose what type of trap you want to built. If you’re wondering on how to make wasp trap, there are several ways to build a wasp nest, by making use of everyday items that you normally have in your house. Homemade wasp traps can be made by anyone with little to no skill.

Wasps are essential for the process of pollination and they also perform some other important actions such as controlling parasite and harmful insect population as well. As good as they are for your environment and especially our surroundings, wasps can really be problematic when they start building theirs nests too close to your furniture or when they start stinging you regularly. In such cases, you may probably want to get rid of the whole mess that comes with a wasp net in your backyard or any other area around your house. Wasp control, sometimes can be a hectic job if you don’t have the right tools.

In this article, we will discuss about the eight homemade wasp traps that you can make at your home with minimal work involved. If you’re looking forward to getting rid of wasps, these models can be of great help to you.

1- Homemade Wasp Trap With a Soda Bottle

The first one we are showing you is one of the simplest homemade wasp catcher models by thespruce that you can build at your home with a few simple items. To make this homemade wasp trap model, you need a two-litre soda bottle, knife, Permanent marker, and a piece of wire. Begin with drawing a line at the bottle’s neck which lies below the taper. By using a knife, chop the top side of bottle that you’ve marked earlier. Now, remove the cap and place the top side of the bottle upside down into the bottom part of the bottle and push it in to complete the setup of your yellow jacket trap.

In order to use a bait in the trap, try using a piece of meat or a small piece of hamburger in the spring and if it’s the summers, try using any sweet liquid. Wherever you see wasp activity, place this trap and wait for it to do the thing. You may also like to check out other relevant and interesting articles homemade mosquito traps.

Homemade Wasp Trap With a Soda Bottle
Make a Wasp Trap With a Soda Bottle, Image via: thespruce

2- DIY Wasp Trap With a Jug

The second wasp trap in our list can be build with use of very basic items like a jug in your home. In order to build this wasp trap model by instructables, assemble a packing tape, razor blade, hot water, sugar, hole punch, and a spoon. Now, begin with cutting off the top third of your jug with the blade. Attach the piece of tape to the jug’s opening. Now, it’s time to invert the top part of the jug and place it in the bottom part of the jug. Once you’ve completed these steps, you now have a homemade wasp trap made out of a jug.

After completing the setup of this wasp trap, you can simply add any sweet item which attracts wasps and place the trap wherever there’s a wasp activity. You may also like to check out other relevant and interesting articles homemade mouse traps.

DIY Wasp Trap With a Jug
Reuse old plastic jug to make a wasp trap, Image via: instructables

3- Creamer Bottle Yellow Jacket Trap 

Wasps can be so irritating if they build a nest around our living premises, especially where it’s very close to our house. In order to combat the wasp problem, this homemade yellow jacket trap by kleinworthco can really help you by leaps and bounds. Get a creamer bottle and cut the top part of the lid. Now, invert the top part of the bottle and place it right in the bottom part of the bottle and tape the two parts together. Now, tie a loop of thread or any similar material so that you can hang this homemade wasp trap somewhere you would like to. After the completion of this setup, make sure that you place any type of food item that attracts the wasps.

Creamer Bottle Homemade Wasp Trap 
Use creamer bottle to make a wasp trap, Image credit: kleinworthco

4- Use Pvc Pipe And Mineral Water Bottle To Make Wasp Trap

Wasp nets can be very problematic, if they were built in our living places, especially if you have kids. Their bites can be allergic to some people for which you need to take care of this issue. Having a homemade wasp trap like this one by dave-cushman can be a great solution if you have wasp nests around your house. Take a mineral water bottle that has a capacity of about five litres, pierce two holes on the two sides of the bottle with a diameter of 2 mm. Now, take a PVC plumbing pipe and cut it down into a small piece and place it through the two holes of the bottle. Also make sure that you place a sweet liquid in the bottle which acts as a bait.

Now, you’ve completed the homemade wasp trap using a bottle and a PVC pipe. In order to attract the wasps, you must fill the trap with a bait. Simply mix some jam in water and fill the trap with this fluid.

Use Pvc Pipe And Mineral Water Bottle To Make Wasp Trap
Make Wasp Trap from Pvc Pipe And Mineral Water Bottle, Image via: dave-cushman

5- Wasp Trap With a Bottle and PEX Tubes

This model of homemade wasp trap by dengarden can be simply made with two items which are a two-liter bottle and a couple of PEX tubes. Take a knife and make two sets of holes with each facing the other hole of a set in the bottle. Once you’re done with it, now it’s time to cut down the PEX tube into two pieces that fit the distance between the holes of bottle. If you have any trouble in making the holes, try using a marker so that you can get a clearer idea. Now, fill the bottom half of bottle with any type of bait that attracts the wasps. As soon as you’re done with that part, your homemade wasp trap is ready to use.

Since there’s a need for the bait here, a good solution is to create one to use. Try mixing apple juice, white vinegar, sugar, cat food morsels, and hot dog slices with the warm water in appropriate quantities. You may also like to check out other relevant and interesting articles homemade fruit fly traps.

Homemade Wasp Trap With a Bottle and PEX Tubes
Wasp Trap With a Bottle and PEX Tubes, Image via:dengarden

6- Plastic Cups Homemade Wasp Trap

In order to build this model of diy wasp trap by creativehomemaking you would need several items which are two plastic cups, duck tape, one water bottle, and a knife. First of all, make use of the knife by cutting down the bottom part of the two drinking cups. Now, take the top parts of both the cups and tape them together. The next step is to cut down the top part of the water bottle. Now take the top part of the water bottle, invert it and place it down the cup. The homemade wasp trap is now complete and it’s time for you to place the bait in the trap to use it.

It’s important to note that wasps get attracted to different types of baits depending on the seasons. You can either use sodas like mountain dew or you can use several types of meat as well. You may also like to check out other relevant and interesting articles  homemade pesticides, and  mosquito and fly repellent plants.

Plastic Cups Homemade Wasp Trap
Plastic Cups DIY Wasp Trap, Image via: creativehomemaking

7- Wasp Trap With a Water Bottle

If you’re having a trouble at dealing with the wasp problem around your house, you may really need to try out creating a homemade wasp trap like this one on  youtube. This model of diy wasp trap can easily be created with a water bottle. Take a knife and cut the top part of the water bottle and place it heads down in the bottom part of the bottle. Now, boil a cup of water and add a cup of sugar to it. Once you get a fluid solution, take to some for it cool down and pour it in the wasp trap you’ve made. Place this wasp trap anywhere you have a wasp problem.

Homemade Wasp Trap With a Water Bottle
Wasp Trap With a Water Bottle, Image via: youtube

8- DIY Hornet and Wasp Trap

If you’re wondering how to make a homemade wasp killer like this one by sereneswede of the simplest models of homemade wasp traps that you can build at your house. You would need a few things to build this wasp trap, which are, a Mason jar, funnel, and a tape. Fill your mason jar with bait and place the funnel through the jar and tape them together. Now you have a homemade wasp trap that’s ready for the use.

DIY Hornet and Wasp Trap
DIY Hornet and Wasp Trap, Image via: sereneswede.blogspot

17 DIY Cornhole Boards To Build And Enjoy This Fun Outdoor Game

Nothing quite gets a family together like a game of bean bag toss using a DIY Cornhole board.

Cornhole or bean bag game as you may say it guarantees unlimited fun and bonding. While the game itself is fun enough to get your close ones together for a round or two of bean bag tossing, building a Cornhole board isn’t a bland activity either.

But how to build a Cornhole board? Yeah we know that’d be your next question. Don’t worry though; we’ve got you covered (as always)! Here We have prepared a list of 17 DIY Cornhole boards for you to have an enthralling weekend with your friends and family.

But first things first, here’s what you’ll need to make them yourself and the basic procedures you’ll need to follow.

Basic tools and materials

  • 4 decks of 8 feet long 2×4 plywood decks
  • 48-inch x 24-inch plywood boards (2 pieces)
  • Chainsaw
  • Power Drill
  • Jigsaw
  • Compass
  • Pencil
  • Sandpaper
  • Hammer
  • Wood glue
  • 3-inch Deck screws
  • 3/8-inch Carriage bolts
  • Tape Measure
  • 3/8-inch wing nuts and washers

Each DIY Cornhole board listed here would require these 14 essential tools and materials. The dimensions and quantities of the nuts, bolts, deck screws and the plywood boards may differ from one DIY Cornhole board to other and any such specific requirements (and any add-ons if needed) would be mentioned under each DIY option.

Procedure

Follow these 8 steps to accomplish your Cornhole board plans.

Step 1: procure all materials that may be required

Step 2: build the frame as required for the cornhole platform

Step 3: check if the layers form a perfect match. If they overlap, you need to give them a quick trim

Step 4: attach the top and bottom layers of the cornhole board with wood glue

Step 5: with a compass, mark the circle to indicate the portion you need to cut down for the hole.

Step 6: cut along the circle using a saw to create a hole in the board. Use a sandpaper to smoothen the circumference.

Step 7: attach the legs to support the board on the ground

Step 8: customize yourc board. This is where the DIY aspect comes into play. Customize the board to suit your requirements using paint, color or other novel ideas.

Having gone through the procedures, check out these 17 DIY Cornhole boards ideas we have collected for you to better understand how to build cornhole boards and set up a fun-filled bean bag game.

DIY Cornhole Boards Projects For Outdoor Fun

1) Regulation-Compliant Boards

You can’t go wrong with DIY boards if you make them in compliance with the regulations specified by the American Cornhole Organization. And that is exactly what you could do if you follow this DIY method. The handles incorporated into the structure make this an innovative Cornhole board option by thisoldhouse. The use of furniture grade veneer makes bean bags skid on the surface of the boards. Find complete instructions for this DIY Cornhole board.

Regulation-Compliant Boards
Image via: thisoldhouse

2) Complete Cornhole Toss Set

Most DIY options focus solely on the boards but if you want to go DIY with the bags too then you won’t find a better alternative than this one. In addition to the board-building material, you’d need a sewing machine, duck cloth and dried corn for making the bean bags. Find out more about it at diypete.com.

Complete Cornhole Toss Set
Image via: diypete.com

3) Inverse Arrow Pattern Boards

You don’t want to gaze at plain, bland plywood while you go about playing the game do you? Paint the board using strips of painter’s tape and create a much more visually appealing inverse arrow pattern. But where exactly do you apply the tape? And how do you use it? See the complete instructions at popular mechanics.

Inverse Arrow Pattern Boards
Image via: popular mechanics

4) Primer-Boosted Boards

Using a primer on the board before you paint it will ensure that the color would last longer and boost the overall appearance of the cornhole set. The finishing would seem a lot smoother and the paint coverage too will extend farther. Know all about this technique at diy network.

Primer-Boosted Boards
Image via: diy network

5) Colored Cornhole Boards

Coloring the boards obviously enhances the visual appeal of your DIY Cornhole board like this one by Rogue engineer. Color your boards in your favorite hues and you might just enjoy the game a bit more than otherwise.

You may also like to see other outdoor projects for kids entertainment like diy treehouse.

Colored Cornhole Boards
Image via: Rogue engineer

6) Storage-Friendly Boards

Traditional, regulation compliant cornhole sets are awkward storage items. They take up a lot of space and that is a major irritant; unless you play the game daily. But these DIY boards by hgtv could easily fold up and shrink to a measly inch and a half. Did anyone mean about space constraints?

Storage-Friendly Boards
Image via: hgtv

7) One For (and from) the Kids!

If you have tried all you could to drag your kids away from their phones and tablets and still failed, don’t lose hope just yet. Get your kids involved in your DIY Cornhole board plans like this one by builtbykids. Let them explore their engineering instincts. Just make this one attempt to get them interested in things outside the digital world and you probably won’t go wrong with it.

DIY Cornhole board plans
Image via: builtbykids

8) Hand Painted Art Work

Have a flair for painting? Then why not display it on a cornhole set like this one by ana-white? Artistic talent is not something that everyone possesses and if you do, then there is no reason why you should not be showing it off. Some of the tips mentioned here would surely help you in your endeavor.

Hand Painted Art Work
Image via: ana-white

9) Bounce Free Cornhole Boards

Deck screws are not aesthetically pleasing in any which way. If your board’s visual appeal is of concern to you, try using finishing nails in combination with an air-powered nail gun. This brief ‘no deck screws’ DIY guide by instructables should help you with that in case you decide to tread down that path. You may also like to see other outdoor projects like diy treehouse.

Bounce Free Cornhole Boards
Image via: instructables

10) The 3×2 Cornhole Board Variant

Bean bag toss is a great family bonding game. But that is not just restricted to the play time! Ask your family, including kids, to take part in the DIY process and trust us you won’t regret it!

3×2 boards (often called ‘tailgating boards) are just what you need if you want to haul them over to a friend’s place. Their shorter length makes it easier to squeeze them in your car trunk. Purists may scoff at this idea but hey, it’s just a game after all! Here’s all you need to know about building a 3×2 Cornhole board by cornholegamebuilders.

3x2 Cornhole Board
Image via: cornholegamebuilders

11) The Star Spangled Version

A sprinkling of blue and red vinyl stars never did anyone any harm! If anything, it will only add to the charm of the game. Sew matching bean bags to enhance the look. This DIY guide by createandbabble should give you a head start.

HOW TO MAKE CORNHOLE GAME BOARDS
Image via: createandbabble

12) Star Wars Cornhole Boards

Alright! This one will take time; really long time! But it is worth all that it takes. You’ll need a foam board, spray paint, painter’s tape and a host of other tools and equipment. But then again, when it’s about star wars, everything is manageable! Check out this comprehensive DIY star wars Cornhole board guide by craftedworkshop.

Star Wars Cornhole Boards
Image via: craftedworkshop.com

13) Collapsible, Lightweight, Colorful

This particular variant solves most problems associated with DIY Cornhole boards like this one by amber-oliver. They are collapsible and lightweight; which means they are easy to store and carry. And a dash of colors would make it a visual treat too. There’s honestly not much working against this DIY board. You may also like to see other outdoor projects like diy playhouse.

DIY Cornhole boards
Image via: amber-oliver

14) Basic, Simple, no Fuss

If you are not too keen on improving the appearance of your DIY Cornhole board and all you care about is getting on with the game then this one would work well for you. No use of colors, no tapes, no paintings, nothing whatsoever! Just a simple, straightforward, step-by-step guide by cornholehowto on how to build Cornhole boards.

DIY Cornhole board
Image via: cornholehowto.com

15) Speak Your Mind!

Yeah we have discussed about displaying your artistic talents on a Cornhole board but how about putting up your thoughts on one? Have a quote that you fancy? Or just a random thought that occurred to you in the shower but has stuck on since? Whatever it is put it up in bold letters on that Cornhole board. Go through this article to know how to build Cornhole boards by homestoriesatoz that speak your mind on your behalf.

how to build Cornhole boards
Image via: homestoriesatoz

16) Rolling Cornhole Boards

Why bother carrying your Cornhole boards around? Like physically transporting them? Get them on wheels and just slide them around wherever you may want to take them. This tutorial by instructables may help. You may also like to see my other outdoor projects like diy cubby house.

Rolling Cornhole Boards
Image via: instructables

17) LED lit Cornhole Boards

Technology and innovation have taken the world by storm. So why not use them to customize your Cornhole boards? And could anything ever be more spectacular to visualize than LED equipped Cornhole boards? Watch this youtube video to understand how to install LED lights on your boards. You may also like to see my other outdoor projects like diy swing set.

LED lit Cornhole Boards

Summary

With 18 different DIY options, all uniquely different in their own right, you’d be spoilt for choice. But then again, isn’t it better than otherwise? DIY is not always the best way forward for all things but for a Cornhole set, you’d struggle to find a better alternative than DIY. So choose what works best for you and have fun gaming! Yeah, thank us later!

23 DIY Window Box Ideas-Build And Fill Them With Colorful Flowers

A DIY window box can give the exterior of your home an instant face lift. The boxes can be created as simple or as elaborate as you want, and built to compliment the architectural style of your home. After the DIY window box is built and installed, just add potting soil and flowers and you’ll instantly increase the beauty and value of your home. Not bad for a couple hours of work. Check out the 23 great diy window box ideas we have compiled for you to find the one that’s just right for your home.

DIY Window Box Ideas And Tutorials

  1. Clean Lines DIY Window Box

The architectural line of these diy flower boxes by lowes are straight and clean, a perfect compliment to a modern or craftsman style home. These free plans take you through the build step by step and show how to modify the width to fit any window size.

Clean Lines Window Box
Image via: lowes
  1. Build A DIY Window Box Under $20

Adding value and beauty to your home’s exterior doesn’t have to cost a lot, these window flower boxes by shanty-2-chic cost under $20 to build. All you’ll need is:

  • 1 cedar fence panel per box
  • Wood glue
  • Nails
  • Cut 2 boards to desired length and  3 to the desired width.
  • Glue and nail boards together to form a 4-sided, bottomless box
  • Cut and attach bottom panel to box with glue and nails
  • Stain or paint
  • Attach metal L-brackets to the bottom and attach to the exterior of the home
  • Fill with potting soil and plant flowers
Build A Window Box Under $20
Image via: shanty-2-chic
  1. Using Cedar Wood To Build A Widow Box Planter

Cedar wood holds up well to the outdoor elements and will last for years. Follow brief instructions to build this cedar window box by lifestorage.

  • Cut cedar wood to desired length and width
  • Glue and screw board together
  • Drill drainage holes in the bottom board
  • Add decorative trim to front board
  • Sand, paint or stain
  • Add shelf brackets to back board and attach to home
Using Cedar Wood To Build A Widow Box Planter
DIY window box Image via: lifestorage.com
  1. Build And Install A Long DIY Window Box

Perfect for homes that have a large picture window like in this plan by twotwentyone. Easy to build and install with these detailed instructions. The end results is breathtaking. You may also like to check out  DIY Hanging Planters.

Build And Install A Long DIY Window Box
DIY window box Image credit: twotwentyone
  1. Follow These Five Easy Steps To Make Window Box

All it takes is five easy steps to create beautiful diy window box planters like this one by remodelaholic.

  • Draw out your design idea
  • Measure window and cut cedar wood planks to desired length and width
  • Assemble boards with wood glue and nails
  • Sand, prime and paint
  • Hang with brackets and plant flower
Follow These Five Easy Steps To Make Window Box
Image via: remodelaholic
  1. Wooden DIY Window Box

Follow these step by step instructions to custom build your own wooden window box like this one by hgtv, complete with decorative brackets that help support the flower box.

Wooden DIY Window Box
Image via: hgtv
  1. Construct Floating DIY Window Box

This DIY creation idea seems to have the window box like this one by houzz floating under the window with no visible means of support. A great, updated and modern version that fits in well with a modern architectural style home.

Construct Floating DIY Window Box
Image via: houzz
  1. Do It Yourself Window Flower Box From Scratch

This design thinks outside the box and creates a unique planter holder. Instead of building a wood box like this one by momspark to hold potting soil, this is more like a wood shelf with holes cut to size to hold terra cotter planters. You may also like to check out DIY Self watering Planters.

Do It Yourself Window Flower Box From Scratch
DIY window box Image via: momspark.net
  1. Add Aesthetic Appeal To Home’s Exterior

This is a great way to use up small slats of wood and add a pop of color to the exterior of your home for almost no money. Use leftover wood strips and these easy to follow instructions to create a unique DIY flower box like this one by instructables.

Add Aesthetic Appeal To Home’s Exterior
Image via: instructables
  1. Make Mock Picket Fence DIY Window Box Just Under 20$

This unique design mimics the tradition white picket fence and give the style and updated look, great for any style home. Get the details for this mock picket fence window box by makeit-loveit.

Make Mock Picket Fence Window Box Just Under 20$
Image via: makeit-loveit
  1. Classic Style DIY Window Box

These free plans for building a classic style DIY window box by bobvila will increase the curb appeal of your home even in winter time when no flowers are in bloom. The front trim and gables underneath add a decorative touch to this classic style that fits in well with any style home.

Classic Style DIY Window Box
Image via: bobvila
  1. Build Window Box and Shutters Together

These plans show you how to build a country style flower box by catzinthekitchen with matching window shutters. Perfect for that trendy farmhouse look. This style would be easy to build from recycled wooden pallets. You may also like to check out DIY wall planters.

Build Window Box and Shutters Together
DIY window box Image credit: catzinthekitchen.com
  1. Picture DIY Window Flower Box

Add a splash of decorative color to the front of your home by building and installing this simple window flower box by ohsolovelyblog.  Detailed plans show you how to build a long flower box that works well for a large picture window.

Picture Window Flower Box
Image via: ohsolovelyblog
  1. Grow Herbs And Veggies In DIY Window Box

A DIY window box like this one by hgtv can also be used to grow herbs and vegetables during the summer. Build this easy window box planter and grow herbs, lettuce, radishes and green onions for a fresh summer salad. You may also like to check out DIY concrete planters.

Grow Herbs And Vegies In DIY Window Box
Image via: hgtv
  1. Video Instructions

This video provides detailed visual instructions for building your own stylish flower box by marthastewart.

building your own stylish flower box
Image via: marthastewart
  1. Brighten Your Home Exterior With Easy To Build Wooden Window Box

Here are some down loadable PDF plans for building a classic style wooden window box like this one by popularmechanics.

Brighten Your Home Exterior With Easy To Build Wooden Window Box
Image via: popularmechanics
  1. $20 Cedar DIY Window Box

Cedar wood is a perfect building material for outdoor projects such as making diy window box like this one by hometalk because it’s resistant to changing weather. Cedar is not very expensive either.

diy window box
Image via: hometalk
  1. Wood Shims

Ordinary wood shims can transform an ordinary diy flower box like this one by thescrapshoppeblog into an extraordinary custom made wood piece.

diy flower box
Image via: thescrapshoppeblog.com
  1. Turn An Aluminum Gutter Into DIY Window Planter

An ordinary piece of aluminum gutter can be fashioned into a modern DIY window box by shelterness with this plan.

Turn An Aluminum Gutter Into DIY Window Planter
Image via: shelterness
  1. Shelf With Removable DIY Window Box

Use this plan to create a window shelf and removable box  Set the planter box on the shelf in the summer and fill with soil and flowers. For fall and winter, remove the box and decorate the shelf for the season.

DIY Window Box

  1. Vintage Style DIY Window Box

A great design for use on vintage or Victorian style homes. It’s just a simple diy window box by thisoldhouse with a little molding added to the front to give it a vintage look.

Vintage Style Window Box
Image via: thisoldhouse
  1. Simple Design

This simple design makes big impact on the exterior appearance of a home. Easy to build widow planter box by houzz. You may also like to check out DIY plantation shutters.

build widow planter box
Image via: houzz
  1. Wood Shim Planter

Wood shims, painted in various colors with leftover paint and mounted on a board in a horizontal pattern make an expensive looking stylish planter box like this one by centsationalstyle.

Wood Shim Planter
Image via: centsationalstyle

15 DIY Plantation Shutters-How To Install Window Shutters

DIY plantation shutters are a stylish way to create unique treatments for your windows. Wooden window shutters are also healthier than fabric curtains since the don’t hold onto dust particles and other allergy causing pollutants.Window coverings will also help reduce the cost of heating and cooling your home, plus they are eco-friendly since they reduce the amount of natural resource needed to keep your home’s interior air temperature comfortable. Check out these 15 DIY plantation shutters ideas and installation advice so you can enjoy the money saving beauty of window shutters in your home.

Related: DIY window box

DIY Plantation Shutters For Window Covering

  1. Wooden Window Shutters

Install a set a classic white wooden window shutters like this one by diynetwork with these easy to follow pictorial instructions. All you need to do is;

  • Measure the window.
  • Measure the shutters.
  • Attach filter strips.
  • Mount shutters in place using a drill to install screws.
  • Check alignment and make any needed adjustments.
wooden window shutters
Image via: diynetwork
  1. Design Custom Size DIY Plantation Shutters

Every home has at least one odd sized window that store bought window treatments like this one by thegeekpub just will not fit. Create your own perfectly sized diy window shutter for that odd window with these detailed plans. Affordable, easy to build and it will solve your privacy needs.

Custom Size DIY Plantation Shutters
Image via: thegeekpub
  1. Build Movable Wood Shutters Using Rockler’s Kit

You don’t have to go it totally alone when constructing DIY shutters like this one by homeconstructionimprovement. there are kits that will help you with the building process from start to finish. Here are simple steps you need to follow to build this wooden shutter from kit.

  • Measure window.
  • Purchase the shutter kit with the louvers as close to the window size as
  • Cut louvers and frame to correct size with a table saw.
  •  Drill all needed holes for pins.
  • Glue and secure joints.
  • Install shutter control arm.
  • Paint and hang shutters.
Build Movable Wood Shutters Using Rockler’s Kit
Image via: homeconstructionimprovement
  1. Make Plantation Shutter From Leftover Wood

These detailed instructions show you how to transform leftover wood from other building projects into fashionable and functional diy window treatments like this one by ibuildit. The window shutter cost is minimal since wood you already have on hand is being used.

Make Plantation Shutter From Leftover Wood
Image via: ibuildit
  1. Measure For And Install Plantation Shutters

Make ordering and installing ready made diy plantation shutters like this one by justagirlandherblog easy with these step by step instructions. Get inspired for installing exterior window shutters when you see the home transformation in these pictures.

Measure For And Install Plantation Shutters
Image via: justagirlandherblog
  1. Install Plantation Shutter With This Easy To Follow Guide

Take all the complicated guess work out of installing attractive diy wooden shutters like this one by foxhollowcottage with these instructions. It doesn’t get any easier than this and these instructions are perfect for someone who is just beginning DIY home projects.

Install Plantation Instructions With This Easy To Follow Guide
Image via: foxhollowcottage
  1. Build And Install Exterior Shutters

Increase the curb appeal and value of your home by adding diy exterior shutters like this one by petitelefant that you can easily build and install yourself. Here are step by step instructions to build this exterior plantation shutter.

  • Purchase wooden fence slabs.
  • Measure and cut six wooden fence slabs in the desired length for each window. Three pieces of wood will go on each side of the window.
  • Measure and cut narrow pieces of fence slabs to be the cross support for each shutter. Two pieces will be needed for each set of three long boards.
  • Secure short, narrow board on top of long boards.
  • Paint or stain as desired. Secure to house exterior with screws.
Build And Install Exterior Shutters
Image via: petitelefant
  1. Get Privacy And Beauty With This DIY Plantation Shutter

DIY plantation shutters like this one by providenthomedesign offer both privacy and beauty to any room of the home. Check out these design ideas for wooden window treatments in the bathroom, kitchen and living rooms, then get busy building your own unique wooden window treatments.

Get Privacy And Beauty With This DIY Plantation Shutter
Image via: providenthomedesign
  1. Simple DIY Build

These instructions break down the building process into simple steps to allow even the novice DIYer to be able to build custom wooden window shutters like this one by wikihow. Tackle your first DIY build with confidence and build beautiful shutters with detailed instructions like these.

DIY wooden window shutters
Image via: wikihow.com
  1. Affordable DIY Window Shutters

Having window treatments like this one by iseekblinds custom built and installed by an outside builder can cost you thousands of dollars, doing it yourself can keep most of that money in your pocket. Follow these plans to create your own attractive and affordable window shutters.

Affordable Window Shutters
Image via: iseekblinds
  1. Board and Batten DIY Plantation Shutters

Board and batten shutters create a timeless look on the exterior of any home. Increase the curb appeal and provide safety for your home with these functional and attractive DIY plantation shutters by divaofdiy.

Board and Batten Shutters
Plantation shutters Image via: divaofdiy.com
  1. Build Plantation Style Shutters

Wide slats, also called louvers, are shutter styles that are perfect for many rooms and can be easily built. Follow this YouTube video for easy building and installation instructions.

  1. YouTube Instructions

If following an instructional video makes building easier for you, then here is one that will easily take you through the process of building custom plantation shutters like this one on youtube.

  1. Custom Blinds DIY Shutters

Learn how to create custom wooden window treatments instructional YouTube video. Easy to follow instructions with beautiful results.

  1. DIY Plantation Shutters By New Yankee

Visit show rooms and other venues that have wooden shutters like this one on youtube over the windows to get inspirational ideas for creating your own DIY window treatments. It’s a good starting point for any custom build and will inspire you go home and custom build home furnishings to personalize your  living space.

Plantation Shutters By New Yankee
Image via:

15 Common Lawn And Garden Weeds-Guide To Weed Identification

A garden with a beautiful lawn and a few flower beds is an asset to a home a housewife will love to have. She will toil to nurse the plants and will take care of the lawn but there is one thing she will hate to see and that is weeds. These unwelcome guests will appear in your lawn and will invade your flower beds using up the nutrients you provide for your plants. The best thing one could do in order to control all types of weeds is to identify them and to use the right methodologies to control their growth and ultimately make the garden free of weeds.

Related: natural weed killers and edible garden weeds.

The following are some of the common lawn weeds and ways to control them in order to minimize the damage caused to a garden by them.

1) Crabgrass:

This is an annual garden weed that thrives on warm weather. It will appear in early spring and is one of the most common weeds that could create lawn problems. Since this plant propagates mainly through its seeds the best thing to do is to remove the plants before the flowers appear. Using the organic pesticide of corn gluten meal in your garden could bring about good results as it will prevent seeds from germinating.

weed Crabgrass

2) Pigweed:

This annual is a weed that spreads through its seeds. Therefore, you must remove it whenever it appears in your garden before it flowers. You can make it out easily with its taproot of red color. However, it is also good to remember that well grown plants of this weed is edible.

Pigweed grass weed

3) Chickweed:

There are two species in this common lawn weed. The annual common chickweed and the perennial mouse ear chickweed are the two. Both these have roots that won’t go deep. Therefore, if you see these weeds in lawn pull them with hand in order to get rid of them.

Chickweed identification

4) Morning Glory:

A common annual garden weed that spreads through its seeds. Its roots go deep and not easy to pull them off. However, the best way to eradicate them is to dig this weed before flowering so as to not to allow seeds to form.

Morning Glory

5) Quack Grass:

Though spread by seeds this creeping perennial also forms a mat of rhizomes on the soil and new shoots rise up from them when conditions are ripe. This easy to identify weed has to be dug out with their rhizomes in order to eradicate them.

Quack Grass

6) Buckhorn Plantain:

This is yet another grass weed you may find growing among the grass of your lawn. It is a hardy plant with slender leaves. Best way to get rid of it is to remove these plants by hand and to destroy them. It thrives throughout the year.

Buckhorn Plantain

7)  Dandelion:

This perennial plant has to be removed from the garden as it could overgrow your lawn. In case you are not able to identify it, you will certainly do when their yellow flowers appear. Remove them by hoeing or through pulling by hand. Corn gluten which is a good natural weed killer could be used to destroy their seeds in early spring.

Dandelion weed plant

8) Annual Sawthistle:

This is another weed you will probably find on your lawn. It grows up to about 18 inches in height and bears yellow flowers. Better way to remove these plants is to pull them off with roots.

Annual Sawthistle

9) Carpetweed:

This annual lawn weed spreads through its seeds. Its stem could have a height of about one foot. Hoeing or pulling plants as they appear is the way to get rid of them.

Carpet weed

10) Large Crabgrass:

This is a weed that could grow on your lawn to a height of 3 feet. Though you could cut it to about 4 inches above ground level to prevent it from flowering, you must not keep it as weeds in grass will compete for nutrients. Corn gluten used early spring could destroy their seeds.

Large Crabgrass

11) Poison Ivy:

This creeper is a dangerous species to have in your garden as it is a poisonous plant. You must remove it and burry or leave it in trash. Must not burn it as the smoke is also poisonous. Mulching with cardboard could prevent this plant from appearing.

Poison Ivy

12) Prickly Lettuce:

This common weed that grows up to 5 feet is easy to identify. Though it has the ability to attract useful insects it is one of the yard weeds you will find in your garden. Pull the plants away or cut their roots below soil.

Prickly Lettuce

13)  Common Mallow:

If your garden is fertile this is one of the grass weeds that will appear most likely during summer. It bears white flowers and will produce a lot of seeds. It is not difficult to pull these plants away from your lawn to get rid of them.

Common Mallow

14) Purslane:

This plant with fleshy leaves and stems will also grow well on well fertilized lawns. Since it grows fast it could soon be a nuisance if you don’t remove it from your garden. Pull these weeds out by hand and remove from your garden.

Purslane weed

15) Common Cocklebur:

This is a plant that could grow up to 4 feet in height. It could poison livestock. Could be used as compost if removed before seeds are formed. Must pull them by hand and dispose.

Common Cocklebur or Clotbur

Conclusion

These are not the only weeds that could invade your lawn and your garden as a whole. Lawn weed identification is the key to success in case you want to have a garden free of weeds.

Note: These plants are weeds as they pop up randomly as against your will so ruins your lawn beauty but on the other hand some weeds are edible that people like to grow such as Dandelion and Buckhorn platain to use in salad or for medical use.

Is about simple living,growing your own food,raising livestock,Do It By Yourself,off grid living,gardening,homemade products